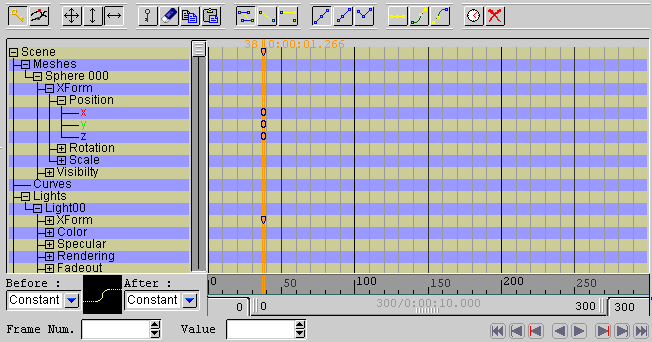
dopesheet mode;
curve editor mode;
Move keyframe value and time;
Move keyframe value only (keyframe time cannot be changed);
Move keyframe time only (keyframe value cannot be changed);
Insert keys at the current time for the selected attributes ar attribute groups;
Delete selected keys;
Copy selected keys;
Paste copied keys. If the copied keys were belonging to one
parameter only and one parameter is selected, the keys are
copied to the selected parameter. Otherwise, the keys are copied
to their original parameter. In every cases, the copied key with
the minimum time value is copied to the current time, the other
keys are translated by the same amount;
Selected parameter is interpolated (between keys) by splines;
Selected parameter is interpolated (between keys) by lines;
Selected parameter is constant until another key defines a new value;
In Spline interpolated mode, the selected keys have the same tangent
before and after, ensuring a very smooth interpolation;
In Spline interpolated mode, the selected keys have colinear tangents
before and after, ensuring a smooth interpolation but a steep
variation in the speed of variation;
In Spline interpolated mode, the selected keys have indepenadant
tangents before and after;
In Spline interpolated mode, set the tangent to be horizontal;
In Spline interpolated mode, point the before tangent of the
selected keys to the previous keys (if any);
In Spline interpolated mode, point the after tangent of the
selected keys to the next keys (if any);
Opens the animation configuration window;
Exits the dopesheet/curve editor mode.
|


 : a key;
 : a selected key;
 : a key at the current frame;
 : a group key (group is not showing its children);
 : a group key, all keys are selected;
 : a group key at the current frame.
 .
.

